Learning how to apply liquid eyeliner for beginners can feel intimidating, especially when the pen suddenly skips or trembles. This guide breaks the process into clear, manageable steps. You will learn how to choose a suitable applicator, prepare your eyelids, and create a balanced line without rushing. The goal is control, not instant perfection.
A steady hand helps, but preparation matters more. Clean, dry eyelids give eyeliner a better surface. Rest your elbow on a table, and work in short sections near the lash line. A felt-tip pen may offer more control than a brush for early practice. Keep cotton swabs nearby for small corrections. They are useful.
The advice here reflects common techniques taught by professional makeup artists and supported by everyday cosmetic hygiene practices. Always check the product label, avoid sharing eye makeup, and replace products according to the manufacturer’s guidance. Stop using eyeliner if you notice burning, swelling, or unusual redness. Safety comes before symmetry.
Your first wing may look uneven. Mine did too. That is normal. Liquid eyeliner rewards repeated practice, not pressure. Some techniques may suit your eye shape better than others, so observe the result in natural light. You might need to adjust the angle, thickness, or drying time. This guide leaves room for that learning process, while offering practical details you can trust. With patience and a few careful attempts, a clean, comfortable line becomes much more achievable.
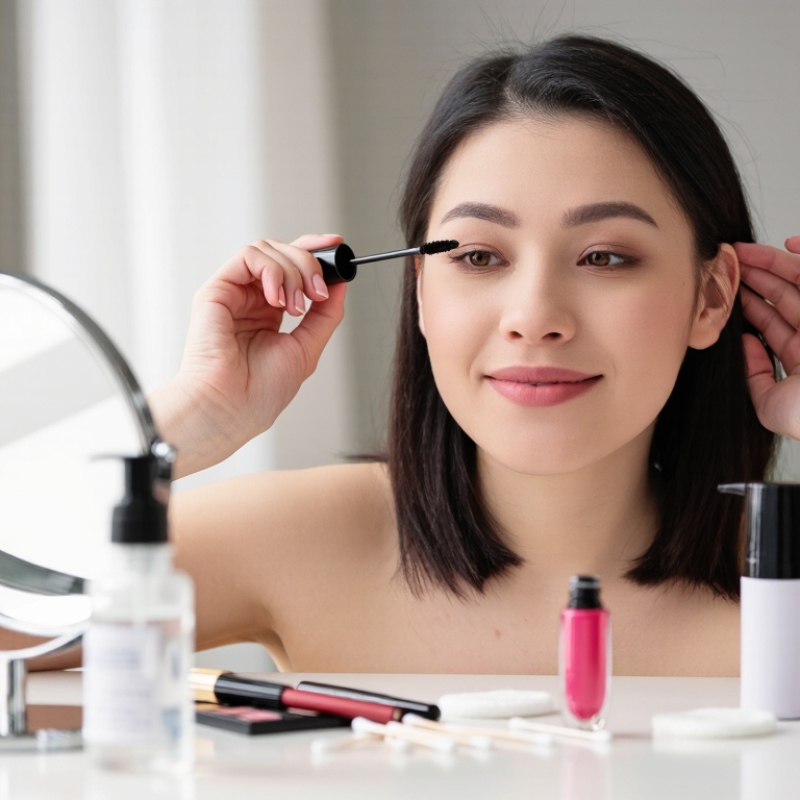
Choose the Right Liquid Eyeliner and Prepare Your Eyes
Choose a liquid eyeliner with a fine, flexible tip and a formula that dries evenly. Felt tips often feel easier for beginners. Brush tips can create thinner, more precise lines with practice. Test the applicator on your hand before bringing it near your eye. The line should flow without skipping or flooding the skin. A fast-drying formula reduces smudging, but it leaves less time for correction. A slightly slower formula may suit unsteady hands better. Keep it simple.
Prepare clean, dry eyelids before applying anything. Remove oil gently with a clean cotton pad, then let the skin dry fully. Heavy eye cream can make liquid liner slide or break apart. If your lids crease easily, apply a small amount of neutral powder. Avoid placing liquid liner inside the waterline, where irritation can occur more easily. Do not share eyeliner, and stop using it if the product changes smell, texture, or color. Replace it according to the package guidance. My early lines were uneven, especially near the inner corners. That mistake taught me to rest my elbow on a table and work in short strokes. Keep the eye relaxed, and look slightly downward into a mirror. Leave the line thin at first. You can build thickness, but removing excess product is harder. If the tip touches the eye, clean it carefully and check for discomfort before continuing.
2026 Top How to Apply Liquid Eyeliner for Beginners?
Choose the Right Liquid Eyeliner and Prepare Your Eyes
This beginner-friendly routine uses practical time estimates: cleanse and dry the eyelids, apply a thin layer of primer, map the direction of the wing, draw short connected strokes, and allow the liner to set before opening the eyes fully. A fine, flexible tip is generally easier for beginners to control than a thick tip.
The chart presents suggested practice timings rather than clinical measurements. Stop using eye makeup if it causes irritation, redness, or discomfort.
Set Up Your Mirror, Lighting, and Hand Position
How to Apply Liquid Eyeliner for Beginners in 2026
Set up your mirror before opening the eyeliner. Place it at eye level, not below your chin. This keeps your eyelids relaxed and reduces awkward head movement. Use bright, diffused lighting from the front. A window can help, but direct sunlight creates harsh shadows. Add a small lamp if one eye looks darker than the other. Keep tissues nearby for quick corrections.
Tips:
Rest both elbows on a table or firm surface. Hold the applicator like a pencil, using a gentle grip. Keep your little finger against your cheek for extra balance. Look slightly downward into the mirror instead of stretching your eyelid. This position shows the lash line more clearly. Work in short strokes. Long, confident lines are attractive, but beginners often lose control halfway through.
Professional makeup training commonly emphasizes a relaxed hand over heavy pressure. Start near the outer corner, then move inward with smaller movements. If the line becomes uneven, pause and check it with both eyes open. I still make one side thicker sometimes, especially under poor lighting. That mistake is useful because it shows where my mirror or hand position failed. Clean the applicator tip before trying again, and avoid pulling the skin tightly. Your natural eyelid shape may need a slightly different angle. Take your time.
Map the Eyeliner Shape Before Drawing the Line
Before touching the eyeliner, map the shape with a soft brown pencil. Grand View Research estimated the global eyeliner market at about USD 3.3 billion in 2023, showing how common this small tool has become. Yet popularity does not make application automatic. Sit facing a mirror, keep both eyes relaxed, and mark three points: the inner corner, the highest point of the wing, and the outer corner. Connect them with tiny strokes. Keep the first map thin.
Compare both eyes before adding pigment. This step exposes uneven angles early, when correction is simple. I once lifted my wing too sharply, and my relaxed eyes looked surprised. That was not the plan. A slightly upward line often follows the lower lash line more naturally than a dramatic angle.
Cosmetic safety guidance from the U.S. Food and Drug Administration advises avoiding eye products with irritation, unusual odor, or changed texture. Use a clean applicator, and never share liquid liner.
Now trace over the map with liquid eyeliner. Start in the center, moving outward with short, controlled strokes. Then fill the inner section lightly. Do not pull the eyelid tightly; releasing it can reveal gaps. If the line looks heavy, remove only the outer edge with a pointed cotton swab. Leave the guide visible until both sides match. My own drawings still differ slightly. That is normal, but checking them in daylight remains worthwhile. Trend reports from Circana continue to show strong consumer interest in eye makeup, yet precision still depends more on planning than speed.
Apply the Liquid Eyeliner in Controlled Short Strokes
2026 Top How to Apply Liquid Eyeliner for Beginners?
Apply the Liquid Eyeliner in Controlled Short Strokes
Liquid eyeliner looks precise, but beginners often expect one perfect sweep. That approach usually creates a thick, uneven wing. Controlled short strokes offer better command. Sit near a window or use a bright mirror. Rest your elbow on a stable surface. Keep your eye relaxed, not stretched.
Start at the center of the upper lash line. Draw a two- to three-millimeter stroke toward the outer corner. Add another stroke beside it, connecting the gaps slowly. Use less product than you think. A fine line is easier to build than remove. Keep the applicator close to the lashes, almost touching them. Pause after every stroke.
Small movements work.
A 2024 Grand View Research analysis estimated the global eye makeup market at roughly USD 17 billion in 2023, showing strong consumer interest in eye definition. Yet popularity does not replace technique. The U.S. Food and Drug Administration advises keeping eye cosmetics clean and stopping use when irritation occurs.
Allow the line to dry before blinking repeatedly. My first attempts were not symmetrical, and correcting them sometimes made both eyes heavier. That mistake taught me to compare each eye after two or three strokes, not after finishing the entire look.
If the outer corner feels too sharp, soften it with a clean, dry cotton swab before the product sets. Practice on a quiet morning. Your hand will learn the pressure.
Fix Common Mistakes and Make the Eyeliner Last Longer
Liquid eyeliner looks precise, but beginners often struggle with uneven wings, skipping, and smudging. My own early attempts became too thick because I tried to correct every shaky movement immediately. A calmer method works better.
Start with clean, dry eyelids.
Oily skincare can weaken the liner’s grip, so wait several minutes before applying makeup. Rest your elbow on a table and keep your little finger against your cheek for control. Draw short strokes along the upper lash line instead of forcing one long line. Keep the inner corner thin, then build thickness toward the outer corner. Let each layer dry briefly. This prevents fresh ink from transferring onto the crease.
If the wing looks uneven,
use a small cotton swab with a trace of makeup remover. Do not rub the whole line away. Clean only the lower edge, then redraw it. Less pressure helps.
For longer wear,
apply a very light layer of translucent setting powder around the lid, avoiding the lash line itself. Heavy powder can make liquid liner crack. A water-resistant formula may help, but no product is completely smudge-proof on oily or watery eyes. I still get uneven wings sometimes. That is useful feedback, not failure. Check the balance with your eyes open, because closed lids can hide small differences. Stop using the liner if burning, swelling, or unusual redness appears, and remove it gently before sleeping.
Conclusion
Learning how to apply liquid eyeliner for beginners starts with choosing a formula and brush that feel easy to control, then preparing the eyelids so the line stays smooth. Set up a well-lit mirror at a comfortable angle, keep your elbow supported, and relax your hand before drawing. Instead of creating one long line, lightly map the desired shape, including the direction of the wing, with small guide marks.
Build the eyeliner gradually using controlled, short strokes close to the lash line. Keep the thickness balanced and adjust the outer corner to suit your eye shape. If the line looks uneven, use a small amount of makeup remover or concealer on a fine tool to clean the edges rather than starting over. Allow the liner to dry fully, avoid rubbing the eyes, and use a light layer of setting powder around—not directly over—the line to help maintain a neat finish throughout the day.

 Nebula Beauty